
Categories
New World

Best New World Iron Ore Locations – New World Guide

In Amazon’s New World, gathering resources is a key aspect of progressing in the game, and one of the essential resources you’ll be mining is Iron Ore. Whether you’re crafting weapons, armor, or upgrading settlements, Iron Ore is vital for many aspects of the game. However, finding the most efficient places to mine Iron Ore can be a time-consuming task. In this guide, we’ll take a deep dive into the best Iron Ore locations in New World, where to find them, and some helpful tips to maximize your mining efficiency. By reading this article, you can learn how to obtain more New World Gold in the game.

What is Iron Ore and Why Is It Important?

Iron Ore is one of the basic materials used in crafting in New World. It is a resource required for refining and crafting Iron Ingots, which in turn are used to create a wide range of items, including tools, weapons, armor, and various consumables. It’s also a staple ingredient in a lot of tier-2 crafting recipes, and its demand is high throughout all stages of the game.

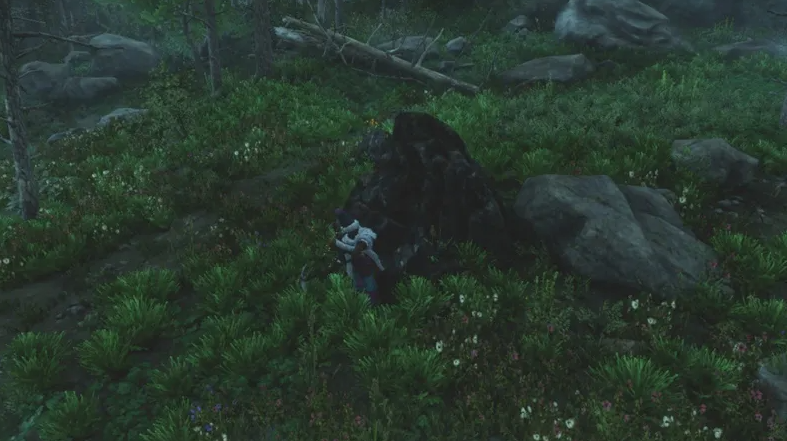
Iron Ore can be found in the wild, typically in rocky or mountainous areas, and is often located in veins that require a pickaxe to extract. As you progress in mining, you’ll want to find locations with higher ore density and minimal competition.

Top Iron Ore Locations in New World

Here are some of the best locations for gathering Iron Ore in New World:

1. First Light (Level 1-15)

Located on the southeast corner of the map, First Light is an ideal starting zone for players who are just beginning to gather resources, particularly Iron Ore. This area is rich in ore nodes, and with a large number of Iron Ore veins scattered across the map, you’ll have no problem collecting the material you need.

Notable Areas: The most Iron Ore veins are found near Tyranny’s End, Misty Hills, and Chamber of the Winds. All of these areas have a variety of ore veins within easy reach of each other, making them perfect for quick farming.

Efficiency Tip: The Iron Ore veins here are abundant and respawn relatively quickly. Focus on these locations for early-game farming, as you can easily complete multiple rounds of mining within a short amount of time.

2. Windsward (Level 15-25)

As you level up and head to mid-tier zones, Windsward is an excellent location for gathering Iron Ore. This area has a good balance of Iron Ore nodes, as well as higher-tier resources. The land is dotted with mountains and rocky outcrops, perfect for Iron Ore veins.

Notable Areas: The best spots to mine Iron Ore in Windsward are around Thornbury, Griffon’s Perch, and Crow’s Keep. These locations are known to have high Iron Ore density and are also close to other valuable resources.

Efficiency Tip: In addition to Iron Ore, you’ll also find other materials like Silver Ore in Windsward, so keep an eye out for mixed nodes while you mine.

3. Monarch’s Bluffs (Level 25-35)

Monarch’s Bluffs is another excellent mid-tier zone, where you can find a considerable number of Iron Ore veins. As you explore this zone, you’ll come across sprawling areas that are rich in resources, making it a prime spot for gathering Iron Ore.

Notable Areas: The Windsward-South Monarch’s Bluff border area is known for high concentrations of Iron Ore. Additionally, regions around Windsward’s Fort and Vineyard offer lucrative opportunities for resource gathering.

Efficiency Tip: Monarch’s Bluffs is a densely populated area for resources, so expect some competition. However, the presence of multiple Iron Ore veins close together can help offset this.

4. Cutlass Keys (Level 35-45)

For mid-to-late-game mining, Cutlass Keys is an excellent choice. This area is known for its mining opportunities, particularly for Iron Ore. With its tropical landscape and mountainous areas, the region offers a good number of veins to farm.

Notable Areas: Around Blackwater Bay and Cutlass Keys itself, there are a number of resource-rich sites. Pay close attention to the large cliffs, as these areas tend to have Iron Ore veins hidden among the rocks.

Efficiency Tip: The terrain in Cutlass Keys can be a bit tricky, but if you are thorough and explore all the nooks and crannies of the region, you’ll find a good amount of Iron Ore.

5. Ebonscale Reach (Level 50-60)

For higher-level players who are in need of Iron Ore, Ebonscale Reach offers a solid supply. This region, with its lush landscapes and mountainous terrain, is home to many rich mining locations.

Notable Areas: Focus your mining efforts in Shrouded Vale and Ebonscale’s Peak areas for abundant Iron Ore veins. These locations also offer other valuable ores like Gold Ore and Platinum Ore.

Efficiency Tip: The Iron Ore here is often mixed with other resources like Gold, making it an efficient location for players looking to stockpile a variety of materials.

6. Restless Shore (Level 60-70)

In the later stages of the game, Restless Shore is one of the best places to gather Iron Ore. It’s a coastal region with rolling hills, rocky outcrops, and a variety of ore veins scattered throughout the landscape.

Notable Areas: Focus on the Boreal Fissures, The Coast of Restlessness, and Fathom’s Reach for the best Iron Ore nodes.

Efficiency Tip: The Iron Ore veins here can be high in quantity, but there is some competition. Try using a route that loops through multiple mining spots to maximize your efficiency.

General Tips for Mining Iron Ore in New World

Use the Right Tools: Make sure to use a high-tier pickaxe with mining perks that increase your yield from ore veins. A good pickaxe can increase your efficiency and gather rate, saving you time and effort.

Look for Mining Expeditions: Many players find mining Iron Ore more efficient when they team up with others. This is particularly useful in higher-level zones where more dangerous creatures and rival players might be present. Create or join a mining group for added safety and speed.

Upgrade Your Mining Skills: You can enhance your mining ability by improving your Mining Skill. As you level up your mining, you’ll gain access to faster mining speeds and higher chances of double ore drops, which can significantly improve your resource haul.

Pay Attention to Biomes: Iron Ore is most commonly found in mountainous or rocky areas, so always look for these features when you’re planning your mining route.

Farm Efficiently: Try to focus on regions where there’s a high concentration of nodes close together, and plan your route so that you can harvest quickly without wasting time running between distant spots.

Conclusion

Iron Ore is an essential material in New World, and knowing where to find it can save you a great deal of time. If you want to obtain more resources, you can also quickly acquire them by purchasing cheap New World Coins. The locations we’ve highlighted, from First Light all the way to Restless Shore, provide excellent opportunities for players of various levels. Remember to keep an eye on your surroundings, equip the best tools, and farm efficiently to make the most out of your mining endeavors. As you progress through the game, gathering Iron Ore will become second nature, and you’ll be well-equipped to craft and upgrade all your gear. Happy mining!

Categories
Call of Duty: Black Ops 7

How to Access Every Lethal Weapon Option in Call of Duty:Black Ops 7

Zombies mode in Call of Duty:Black Ops 7 thrives on speed, positioning, and crowd control. While weapons and perks get most of the spotlight, Lethal Equipment often determines whether you stabilize a bad situation or get overwhelmed. With seven unique Lethal options available—each unlocking at different player levels—understanding their strengths and weaknesses is essential for efficient high-round play.

  1. Point Turret – Automated Firepower That Falls Short

Unlock Requirement:Level 33

Crafting Cost:300 Salvage

At first glance, the Point Turret appears promising. Once deployed, it automatically targets and fires at nearby zombies. Unfortunately, its damage output and targeting speed struggle to keep up with escalating zombie health.

While it performs adequately in Multiplayer, Zombies mode exposes its limitations. The turret rarely clears threats efficiently and often disrupts zombie pathing rather than solving problems. With stronger and more flexible Lethal options available, the Point Turret is usually not worth the salvage investment.

  1. Cluster Grenade – Explosive Chaos With Inconsistent Results

Unlock Requirement:Level 5

Crafting Cost:250 Salvage

The Cluster Grenade detonates into multiple secondary explosions that spread across a wide area. This makes it visually impressive and potentially effective against dense groups of zombies.

However, its unpredictable spread works against precision play. The scattered blasts can miss key targets or cause self-stagger—even when running PhD Flopper. Tight training routes and controlled strategies suffer due to the lack of reliability. While serviceable in early rounds, it struggles to maintain value later on.

  1. Molotov – Reliable Burn Damage With Tactical Drawbacks

Unlock Requirement:Level 26

Crafting Cost:350 Salvage

Molotovs create lingering fire zones that continuously damage zombies passing through them. They shine against enemies weak to fire, including Zursa Zombie Bears, making them situationally strong.

That said, Molotovs come with trade-offs:

Persistent flames can damage players during recovery moments

They lack instant wave-clearing potential

Damage scaling becomes less impressive in higher rounds

Molotovs are useful early and mid-game but rarely remain impactful during late-round endurance runs unless you’re practicing routes in controlled environments like Black Ops 7 bot lobbies.Whether you’re learning the basics or polishing advanced strategies, MMOexp CoD Black Ops 7 Bot Lobbies provide a safe, relaxed space to play, experiment, and improve without pressure.

  1. C4 – Tactical Destruction for Prepared Players

Unlock Requirement:Level 41

Crafting Cost:400 Salvage

C4 offers massive burst damage and full detonation control. Players can carry multiple charges, stick them to surfaces, and manually trigger devastating explosions once zombies are properly grouped.

However, C4 demands planning and discipline:

Traps must be placed ahead of time

Zombies must be lured into optimal blast zones

Detonation delays can be fatal in narrow spaces

It’s the most expensive explosive to restock

In skilled hands, C4 can erase entire waves—but it’s not forgiving for fast, reaction-based playstyles.

  1. Frag Grenade – A Timeless Zombies Staple

Unlock Requirement:Available by default

Crafting Cost:250 Salvage

The Frag Grenade remains one of the most versatile tools in Zombies. Its ability to be cooked allows for precise timing, while bounce mechanics open up creative angles and escape options.

Strengths include:

Reliable damage

Low salvage cost

Flexible usage during training

The main downside is the need to cook the grenade, which temporarily limits sprinting during high-pressure moments. Even so, Frags scale surprisingly well and remain useful across all skill levels.

  1. Semtex – Fast, Sticky, and Extremely User-Friendly

Unlock Requirement:Level 12

Crafting Cost:250 Salvage

Semtex grenades prioritize speed and consistency. They detonate quickly, stick to surfaces or enemies, and remove the need for cooking or bounce calculations.

The predictable explosion radius and instant throw animation make Semtex one of the safest and most efficient Lethal choices, especially for players refining mechanics before testing builds in practice lobbies.

  1. Combat Axe – The Ultimate Lethal for Zombies

Unlock Requirement:Level 54

Crafting Cost:200 Salvage

The Combat Axe stands above every other Lethal Equipment option in BO7 Zombies.

What makes it exceptional:

One-hit kills on standard zombies

Infinite damage scaling

Retrievable after every throw

Fast release animation

Extremely low crafting cost

Unlike explosives, the Combat Axe never loses effectiveness as rounds progress. It’s a favorite among speedrunners, high-round specialists, and efficiency-focused players.

If Zombies is your primary mode, this should be your default Lethal choice almost every game.

Mastering Lethal Equipment selection is a key part of surviving deeper into Black Ops 7 Zombies. Whether you’re playing casually or optimizing routes for high rounds, choosing the right tool can mean the difference between a clean rotation and an early down.Skip the chaos and get straight to results. MMOexp buy Black Ops 7 Bot Lobbies let you farm XP, practice loadouts, and sharpen mechanics efficiently, so you’re always one step ahead when it counts.

Categories
Diablo IV

Diablo 4 Season 11 Unique Purified Essences Guide

Diablo 4 Season 11 is packed with hidden mechanics, secret encounters, and unexplained systems-but few have confused players as much as Unique Purified Essences. At first glance, these items seem like leftover quest materials used to unlock Purified Slots for Divine Gifts through Hadriel. However, many players quickly noticed something strange: Unique Purified Essences continue to drop even after all Purified Slots are unlocked.

So what are these items actually for?

In this guide, we’ll break down what Unique Purified Essences are, where to use them, how to trigger the hidden ritual, and what rewards you earn for completing one of the most secretive encounters in Diablo 4 Season 11.

What Are Unique Purified Essences in Diablo 4?

During Season 11, players fighting Lesser Evils across Sanctuary can obtain special items known as Unique Purified Essences. Each Essence is tied directly to one of the four iconic Lesser Evils:

·Andariel

·Duriel

·Azmodan

·Belial

These Diablo 4 Items are not standard Purified Essences and cannot be used at Hadriel. Instead, each one corresponds to a mysterious altar hidden somewhere in Sanctuary. Blizzard provides no quest markers, UI hints, or journal entries for this system-making it one of Season 11’s best-hidden mechanics.

What to Do With Unique Purified Essences

Each Unique Purified Essence must be taken to a specific altar located in a particular region of the world. When you interact with the correct altar while holding the matching Essence, the altar ignites with hellfire.

At first, nothing else seems to happen.

This led many players to assume the system was unfinished or bugged. In reality, this is only one step of a larger ritual. The secret lies in activating all four altars. Once every altar has been ignited, a red portal opens, granting access to a powerful hidden encounter.

How to Get Unique Purified Essences

Unique Purified Essences drop from specific endgame bosses tied to each Lesser Evil in Season 11:

·Andariel – Kurast Undercity

·Azmodan – Hawezar events

·Belial – The Pit of the Artificer

·Duriel – Helltides

Each boss drops only their own Essence, so if you’re missing one, you’ll need to farm the corresponding activity. For example, if you still need Andariel’s Essence, focus your runs on the Kurast Undercity.

Locations of the Altars for Unique Purified Essences

Below are the confirmed locations of all four altars and the items required to activate them.

1) Altar of Anguish – Andariel

·Region: Nahantu – Seven Stones

·Nearest Waypoints: Kurast Docks or Samuk

·Required Item: Purified Claw of Andariel

Travel east from Kurast Docks for the fastest route. Using Andariel’s Claw ignites the altar in crimson flames.

2) Altar of Lies – Belial

·Region: Fractured Peaks – Seat of the Heavens

·Nearest Waypoint: Bear Tribe Refuge

·Required Item: Purified Eye of Belial

Ride east from Bear Tribe Refuge to find a glowing green altar hidden among the mountain paths.

3) Altar of Sin – Azmodan

·Region: Hawezar – Umir Plateau

·Nearest Waypoint: Hawezar

·Required Item: Purified Tongue of Azmodan

Head northeast from the Hawezar waypoint rather than following the standard Azmodan event route.

4) Altar of Pain – Duriel

·Region: South of Caldeum

·Required Item: Purified Horn of Duriel

This altar is hidden just outside Caldeum and was initially discovered through community exploration before being fully confirmed.

The Secret Boss Encounter Explained

Once all four altars are activated, a red portal appears nearby. Entering it begins a brutal multi-phase boss fight against the Lesser Evils themselves.

Fight Structure

·Two Lesser Evils attack simultaneously

·After defeating them, the remaining two spawn

·Heavy AoE damage, overlapping mechanics, and extreme pressure

This is one of the hardest encounters in Diablo 4 Season 11 and is best attempted with a fully optimized endgame build. Many players prepare by upgrading gear, rerolling stats, or choosing to buy Diablo IV Items to save time before attempting the ritual.

Rewards – Chest of Damnation

Completing the encounter rewards you with a Chest of Damnation, which contains:

·Resplendent Spark

·Large amounts of Greater Affix gear

·High-end loot is ideal for late endgame optimization

For players pushing high-tier Pit content or refining endgame builds, the rewards are absolutely worth the effort.

Are Unique Purified Essences a Bug?

No. Unique Purified Essences are fully intentional. Blizzard has simply chosen not to explain them through quests or UI prompts. This system is designed to reward exploration, experimentation, and community discovery.

While players continue to investigate whether additional secrets exist, the four-altar ritual and Lesser Evil encounter are currently the confirmed purpose of Unique Purified Essences in Season 11.

Final Thoughts

Unique Purified Essences are one of Diablo 4 Season 11’s most rewarding hidden systems. What initially looks like useless clutter turns into a high-stakes ritual, a brutal boss encounter, and some of the best loot available this season. If you’ve been hoarding these items without knowing why, now you know exactly how-and why-to use them.

Categories
Call of Duty: Black Ops 7

Fastest Way to Unlock Permanent Perks in Call of Duty: Black Ops 7 Zombies

If you’re wondering how to get Permanent Perks in Black Ops 7 Zombies, how the T.E.D.D. Tasks work, and what you need to prepare before attempting them, this complete guide breaks down the entire process step-by-step. Permanent Perks are one of the strongest progression systems in Ashes of the Damned, and mastering them is crucial for high-round pushing, easter egg attempts, and long-form survival strategies.

This SEO-optimized guide explains how to unlock every Permanent Perk, how T.E.D.D. Tasks function, and why learning these mechanics is much easier when practiced in Call of Duty Black Ops 7 Bot Lobbies-especially for newer players who want a smoother learning curve.

What Are Permanent Perks in Black Ops 7 Zombies?

Permanent Perks work exactly like regular Perk-a-Colas, but with a powerful twist:

Once you unlock a Permanent Perk, you keep it for the rest of the match-even after being downed or fully dying.

This means that if you permanently unlock:

·Jugger-Nog

·Stamin-Up

·Quick Revive

·Death Perception

·Elemental Pop

…you will respawn with them immediately on the next round. While Permanent Perks do not transfer between different matches, they are essential for late-game consistency, boss encounters, and high-round strategies where survivability is everything.

Step 1 – Purchase All 12 Perk-a-Colas

Before you can even attempt earning Permanent Perks, you must buy all 12 Perks available on the Ashes of the Damned map.

This is the biggest hurdle-and the most expensive.

How Much Essence You Need

Perk prices increase by 500 Essence per purchase, meaning each new Perk is more expensive than the last. To buy all 12, you’ll need roughly:

63,000 Essence total

You can obtain Perks from:

·Their individual Perk Machines are scattered throughout the map

·Der Wunderfizz, which spawns after Round 20 at the north end of Janus Towers Plaza

Buying all Perks early is mandatory. Without all 12 unlocked, T.E.D.D. Tasks cannot reward Permanent Perks.

This step is dramatically easier if you practice early-round setups in Call of Duty Black Ops 7 Bot Lobbies, where Essence farming is simpler and safer. Many players choose to buy CoD Black Ops 7 Bot Lobbies to learn perk routes and reduce early-game pressure.

Step 2 – Wait for a T.E.D.D. Task to Spawn

Once all Perks are owned, your next objective is to complete a T.E.D.D. Task.

How T.E.D.D. Tasks Work

·Spawn every 4-6 rounds

·Location is random each time

Marked on:

·Your HUD

·Your minimap

·The world, via a vertical swirling energy pillar

T.E.D.D. Tasks vary widely. Common variants include:

·Escort missions

·Timed challenges

·Kill-based objectives

·Zone defenses

·Mystery Perk challenges

Each task comes with its own scoring system. Your final rating determines your reward.

Step 3 – Complete the T.E.D.D. Task With Maximum Rank

To earn a Permanent Perk, you must complete the task with:

Tier S / Legendary rating

This is essential. Only max-rank completions yield the Mystery Perk drop that converts into a Permanent Perk.

Why Maximum Rank Matters

A top-rank T.E.D.D. Task grants:

·Legendary loot rewards

·A guaranteed Mystery Perk

But the key is this:

If you already own all 12 Perks, the Mystery Perk automatically becomes a Permanent Perk.

A message will appear on the right side of your screen:

“Permanent Perk Obtained: [Perk Name]”

This confirms it is locked in until the match ends-even if you fully bleed out.

Step 4 – Repeat T.E.D.D. Tasks to Unlock All Permanent Perks

There is no limit to how many Permanent Perks you can unlock in one match.

The loop is simple:

1. A T.E.D.D. Task spawns every 4-6 rounds

2. Complete it with the maximum rating

3. Receive a new Permanent Perk

Because the reward order is random, it may take multiple cycles to unlock every Permanent Perk. Expect 6-10+ tasks depending on RNG.

Once again, the consistency and safety of Call of Duty Black Ops 7 Bot Lobbies make them ideal for practicing T.E.D.D. routes without worrying about elite spawns or chaotic crowd control. Many players choose to buy CoD Black Ops 7 Bot Lobbies specifically to streamline these early attempts.

Why Permanent Perks Are Game-Changing

Permanent Perks offer massive benefits in Zombies mode:

1. Perfect for Easter Egg Attempts

You no longer lose your perk loadout during multi-stage boss fights.

2. Essential for Solo Players

Quick Revive and Stamin-Up, staying active after a down dramatically improves survivability.

3. Better High-Round Consistency

Jugger-Nog, Elemental Pop, Deadshot Daiquiri, and Death Perception remain active even after full deaths.

4. Saves Tens of Thousands of Essence

No more repurchasing expensive Perks after every revive.

Tips to Earn Permanent Perks Faster

·Farm early Essence using Contracts and Elite kills

·Keep armor upgraded to avoid dying in T.E.D.D. Tasks

·Use Pack-a-Punched weapons for stronger objective clearing

·Save a zombie to move freely toward T.E.D.D. objectives

·Coordinate in co-op for escorts and holdout events

Practicing mechanics and routes inside Call of Duty Black Ops 7 Bot Lobbies can significantly reduce your learning curve, especially for new players learning spawn patterns.

Final Thoughts

Unlocking Permanent Perks in Black Ops 7 Zombies requires planning, smart Essence management, and mastery of T.E.D.D. Tasks-but the payoff is absolutely worth the effort. Once you start stacking Permanent Perks, the entire flow of Ashes of the Damned becomes more rewarding, less punishing, and far more strategic.

Categories
Path Of Exile

PoE 3.27:Key Updates and Balance Overhauls

Path of Exile upcoming 3.27 patch is shaping up to be one of the most dramatic balance updates in recent memory. From defensive nerfs to skill overhauls and tweaks to the in-game economy, this update promises to reshape the meta. Here’s a closer look at what players can expect.

Energy Shield and Trickster Rebalancing

Energy Shield-dominant builds ruled the previous league, with Trickster, Divine Shield setups, and certain edge-case Female Edge configurations taking over endgame content.

Trickster Ascendancy may see reductions to its evasion and sustain bonuses.

Divine Shield and Whispers of Infinity (from Zanab) are likely to be toned down.

Sea Glass Amulet interactions could also be adjusted to limit overpowered sustain loops.

Players who rely heavily on Energy Shield setups should prepare for a more challenging early game.

Explosive Concoction Gets Nerfed

The mid-season breakout star Explosive Concoction has made leveling incredibly fast and reliable. Patch 3.27 is expected to reduce its damage or increase its cooldown, reining in its overperformance. While it will remain a viable leveling option, progression with this skill may no longer feel as effortless.

Buffs and Nerfs for Underperforming Skills

Not all changes are nerfs. Some previously underused mechanics are set to get improvements:

Pedal skills, long considered awkward or weak, may receive damage buffs and quality-of-life improvements.

Risk Scarabs, known for giving players easy loot, are likely to be scaled down to reduce imbalance.

These adjustments aim to diversify gameplay and reward more creative strategies.

Trithan Skills Move to Heist Content

Trithan skills, which have historically underperformed, are being relocated into Heist content. This move may come with minor power adjustments or additional utility, giving these skills new life in a different context.

Evolving Shrines and Map Changes

The Evolving Shrine system, particularly when paired with the Alva Strat, allowed for repeated monster respawns and easy rare conversions. Patch 3.27 is expected to cap or rebalance this system to prevent infinite spawns, which will ripple across the in-game economy.

Expect certain Path of Exile items—especially hybrid defense or utility-focused gear—to rise in value as a result.Don’t let currency shortages hold you back—get your POE currency on MMOexp now and thrive!

Major Balance Wave and Ascendancy Reworks

GGG has teased significant changes across skills and ascendancies. Speculated highlights include:

Arc Mage & Arcane Cloak:Nerfs to prevent overpowering early-game setups.

Rune Graph Forge:Potential removal or heavy nerf, impacting global defense stacking.

Allflame of Gilded:Adjustments to reduce Tier 17 gold farming.

Elementalist Golem bonuses:Reduced to limit domination in endgame content.

Smite & Volcanic Fissure:Minor popularity-based adjustments.

Patch 3.27 may also finally deliver long-awaited Wander reworks, Assassin buffs, and Allflame redesigns.

Wander, Assassin, and Beyond Reworks

Wander could see its first major overhaul in years, revamping its playstyle and viability.

Assassin has long been overshadowed by Trickster, Occultist, and Raider. Buffs or a full rework could make dagger and crit builds relevant again.

Beyond content may be enhanced with adjusted spawn rates or passive tree changes, making encounters more rewarding.

Other Speculative Changes

Some of the more interesting predictions for 3.27 include:

Fire skill buffs, especially for non-Righteous Fire setups.

Molten Strike & Storm Brand reworks, revisiting older, satisfying mechanics.

Herald of Ice & Thunder buffs, reviving classic builds.

New Essences & Breach uniques, continuing POE’s content expansion.

Dual-wield melee improvements, long overdue.

Early gold cost reductions, easing midgame progression.

Fans are also hoping for a Head Hunter revival, dagger buffs, and perhaps a new Maven invitation or Breach skill line.

Patch 3.27 is poised to be transformative. With Energy Shield nerfs, Wander reworks, and Beyond system adjustments, the meta could shift dramatically.

Players are advised to organize their stash, sell overvalued items, and stock up on POE currency or key Path of Exile items to remain flexible.Unleash the power of purchasing buy POE currency through MMOexp and unlock endless possibilities! Whether you’re a Trickster main, an Energy Shield enthusiast, or simply chasing new builds, this patch is shaping up to be one of the wildest yet.